How to Use AI to Design a Room: A Complete Beginner's Guide
Learn how to use AI to design a room in minutes. Upload a photo, pick a style, and get a photorealistic redesign — no design experience needed. Free to try.

Most people redesign a room the hard way. They browse Pinterest for hours, buy furniture that looked great online but clashes with their walls, and end up with a space that feels like it was designed by committee. Learning how to use AI to design a room skips all of that. You upload a photo, choose a style, and get a photorealistic preview of your redesigned space in under 60 seconds — before you spend a dollar.
What does "using AI to design a room" actually mean? You give an AI interior design tool a photo of your existing room. The AI analyzes the layout, dimensions, lighting, and architectural features, then generates a new image showing that same room transformed into a completely different style. The result isn't a generic mood board or a rendering of someone else's space. It's your room, reimagined.
What You Need to Get Started
The barrier to entry is remarkably low. You need two things:
A photo of your room. Any smartphone photo works. Wider angles produce better results because the AI has more context to work with. Natural lighting helps but isn't required — the AI adapts to whatever conditions are in the photo. Include as much of the room as possible: walls, floor, ceiling line, windows, and existing furniture.
An idea of what you want. This can be as specific as "Scandinavian minimalism with warm wood accents" or as vague as "something modern." The AI offers over 100 design styles, so even if you can't name what you like, you can browse options and find it.
That's it. No measurements, no floor plans, no design degree, no $200-per-hour consultation.
How to Use AI to Design a Room: Step by Step
Here's the complete process using NewInterior AI's room designer.
Step 1: Upload Your Photo
Open the AI room design tool and upload a photo of the room you want to redesign. A few tips for the best results:
- Shoot from a corner to capture two walls and the floor
- Include natural light sources like windows — the AI uses these to create realistic lighting in the output
- Clear major clutter if you can, though the AI handles messy rooms reasonably well
- Landscape orientation generally works better than portrait
You can upload multiple photos if you want to try different angles of the same room.
Step 2: Choose Your Room Type
Select the room type that matches your photo. The tool supports 35+ room types organized into categories: living rooms, bedrooms, kitchens, bathrooms, home offices, dining rooms, nurseries, game rooms, reading nooks, and more. Choosing the right room type helps the AI understand what furniture and fixtures belong in the space.
Step 3: Pick a Design Style
This is where it gets interesting. Browse 100+ design styles or search for something specific. Popular starting points for beginners:
- Modern — clean lines, neutral palette, minimal decoration
- Scandinavian — light colors, natural wood, cozy textures
- Farmhouse — warm wood, rustic charm, inviting atmosphere
- Mid-Century Modern — retro furniture shapes, organic curves, bold color accents
- Bohemian — layered textures, rich colors, eclectic personality
Don't overthink this step. You can generate multiple versions in different styles for the same room. Most people try three to five styles before finding the one that clicks.
Step 4: Customize (Optional)
For more control, expand the advanced options to specify:
- Color preferences — warm tones, cool tones, monochrome, or specific colors
- Materials — wood, marble, concrete, brass, fabric types
- Lighting mood — bright and airy, warm and cozy, dramatic and moody
- Budget level — the AI adjusts furniture and material suggestions to match your budget range
These are optional. The AI produces strong results with just a room type and style selection.
Step 5: Generate Your Design
Hit generate and wait about 30 to 60 seconds. The AI produces a photorealistic image of your room in the selected style. It preserves your room's architecture — window positions, door locations, ceiling height — while transforming surfaces, furniture, colors, and decor.
Save the result, download it, or generate another version. Each generation gives you a different interpretation, so running the same inputs twice produces two distinct designs.
Understanding Your AI Design Results
The output is a visualization, not a construction blueprint. Here's how to read it correctly.
What's realistic: Color schemes, furniture styles, general layout, material combinations, and overall aesthetic direction. If the AI shows your living room with a navy velvet sofa and brass accents against white walls, that's a combination you can confidently replicate.
What's aspirational: Exact furniture pieces, precise architectural details, and custom built-ins. The AI might show a gorgeous built-in bookshelf that would require carpentry to actually build. Use these elements as directional inspiration rather than literal shopping lists.
The sweet spot: Treat AI renders the way an architect treats a sketch — as a communication tool that captures intent and direction. Show the image to a contractor, a furniture salesperson, or your partner. It's worth a thousand words of description.
Which Rooms Work Best With AI Design
AI design works for any room, but some spaces benefit more than others.
Kitchens
Kitchens have the most fixed elements — cabinets, countertops, appliances, backsplash — and all of them need to work together. AI visualization is especially valuable here because one wrong material choice can derail an entire renovation. Use the AI kitchen design tool to test combinations before committing.
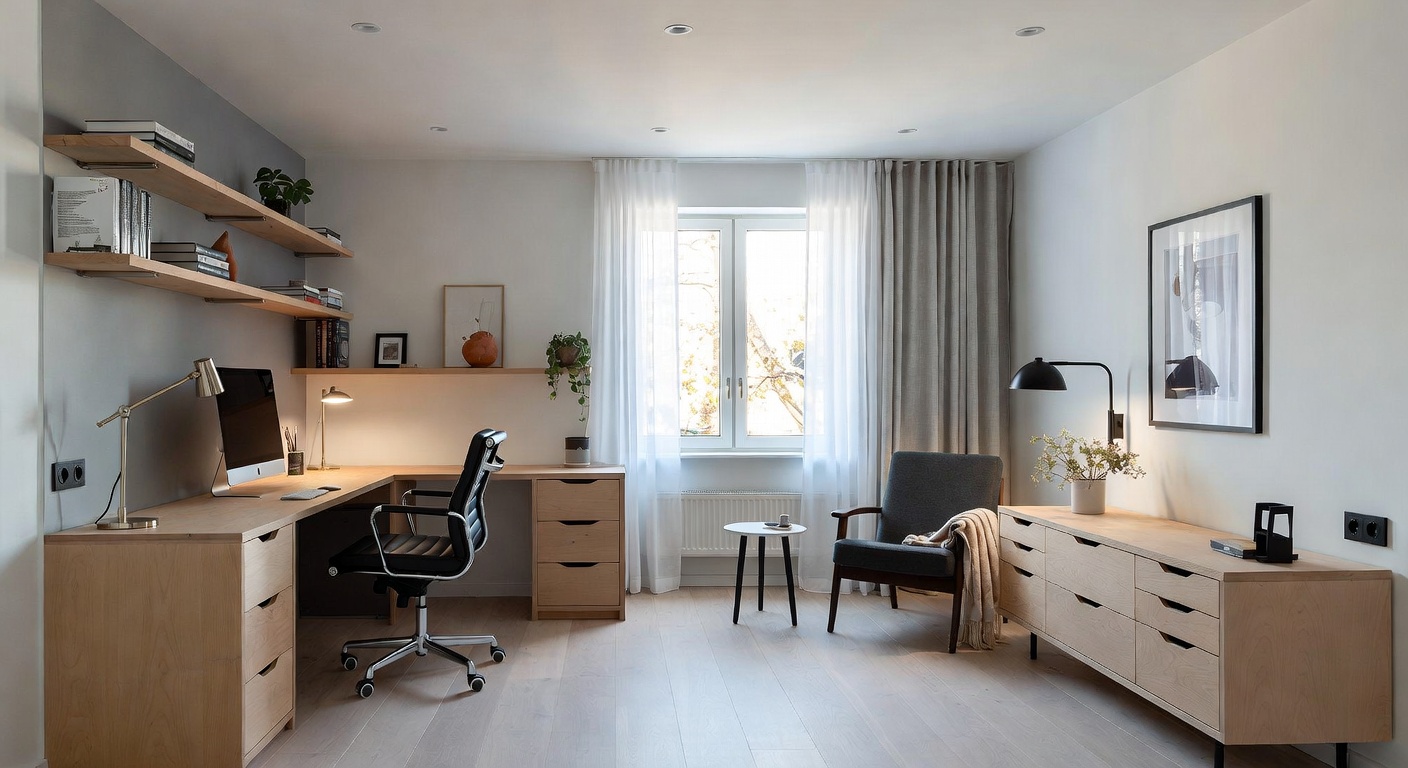
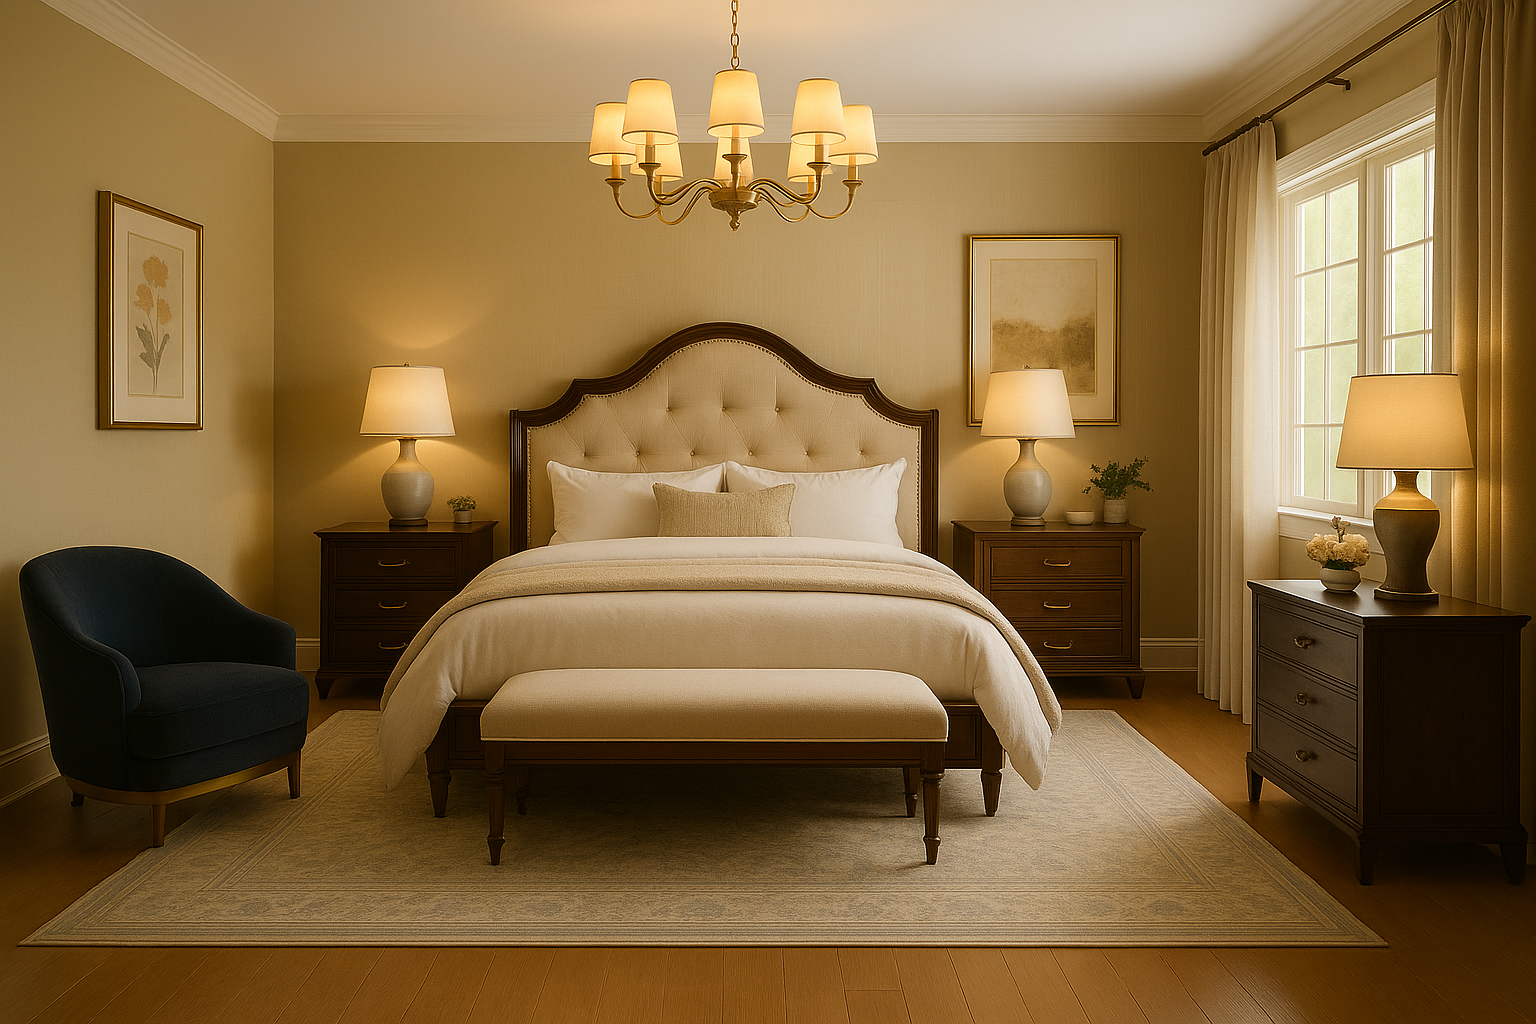
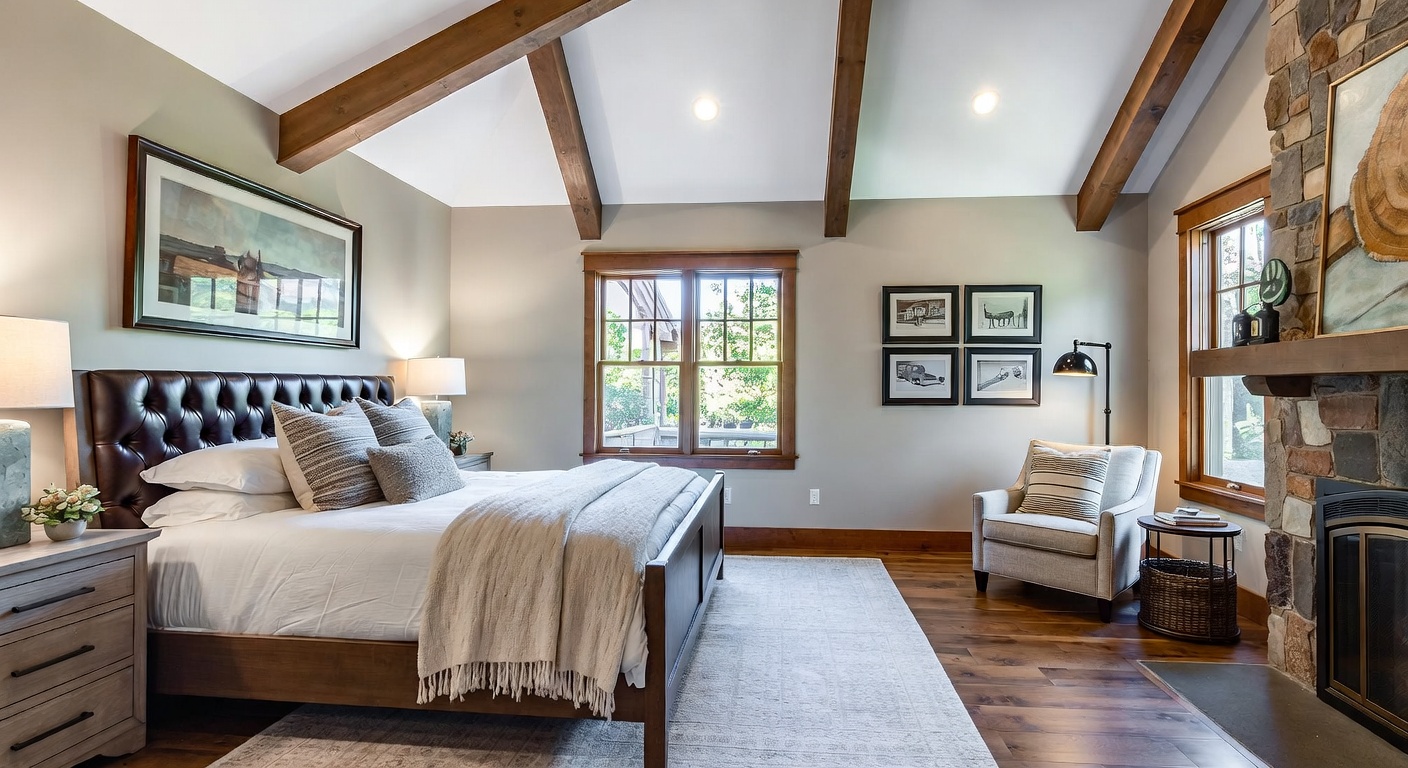
Bedrooms
Bedrooms are the most personal room in your home, and AI helps you explore styles you might not have considered. A bedroom that's been "traditional beige" for a decade might look stunning in a dark academia or warm minimalism style. AI makes it safe to experiment.
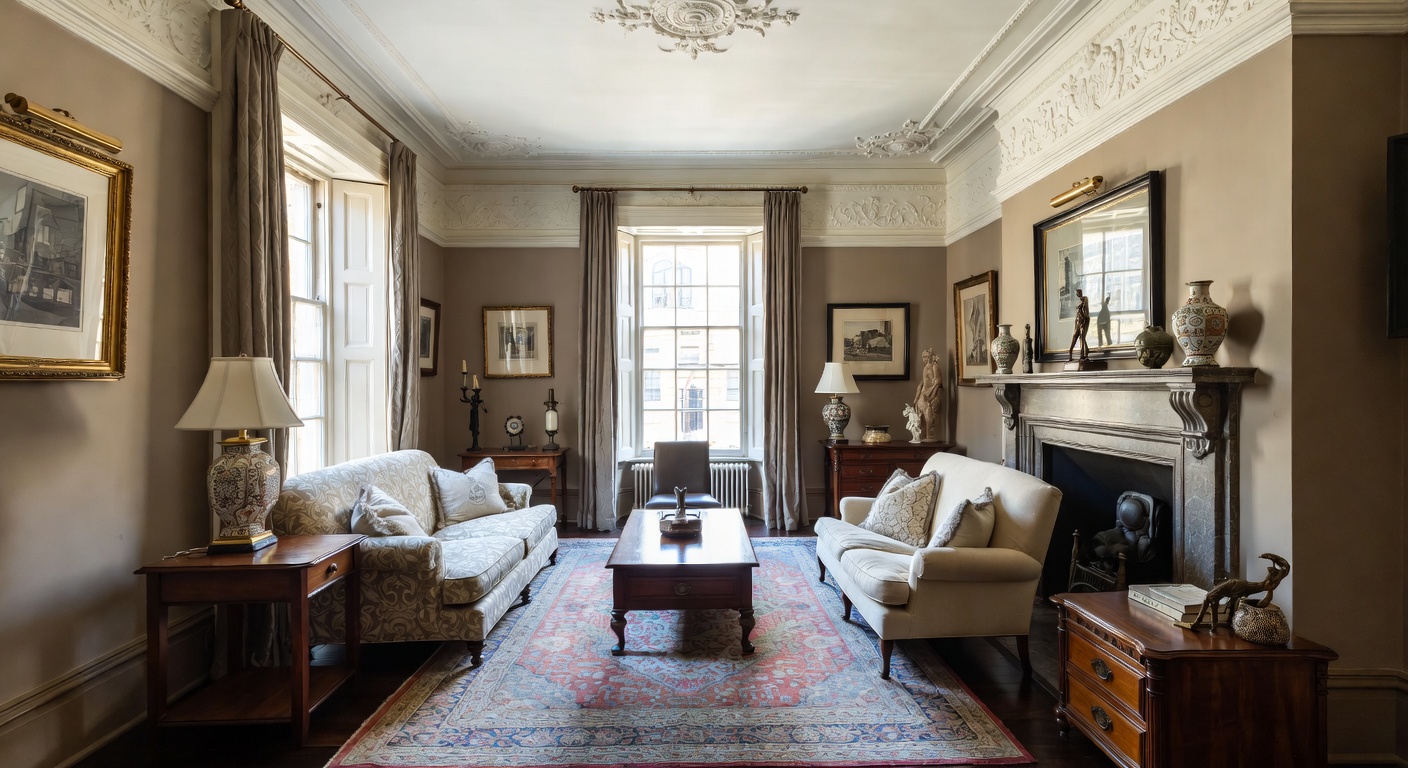
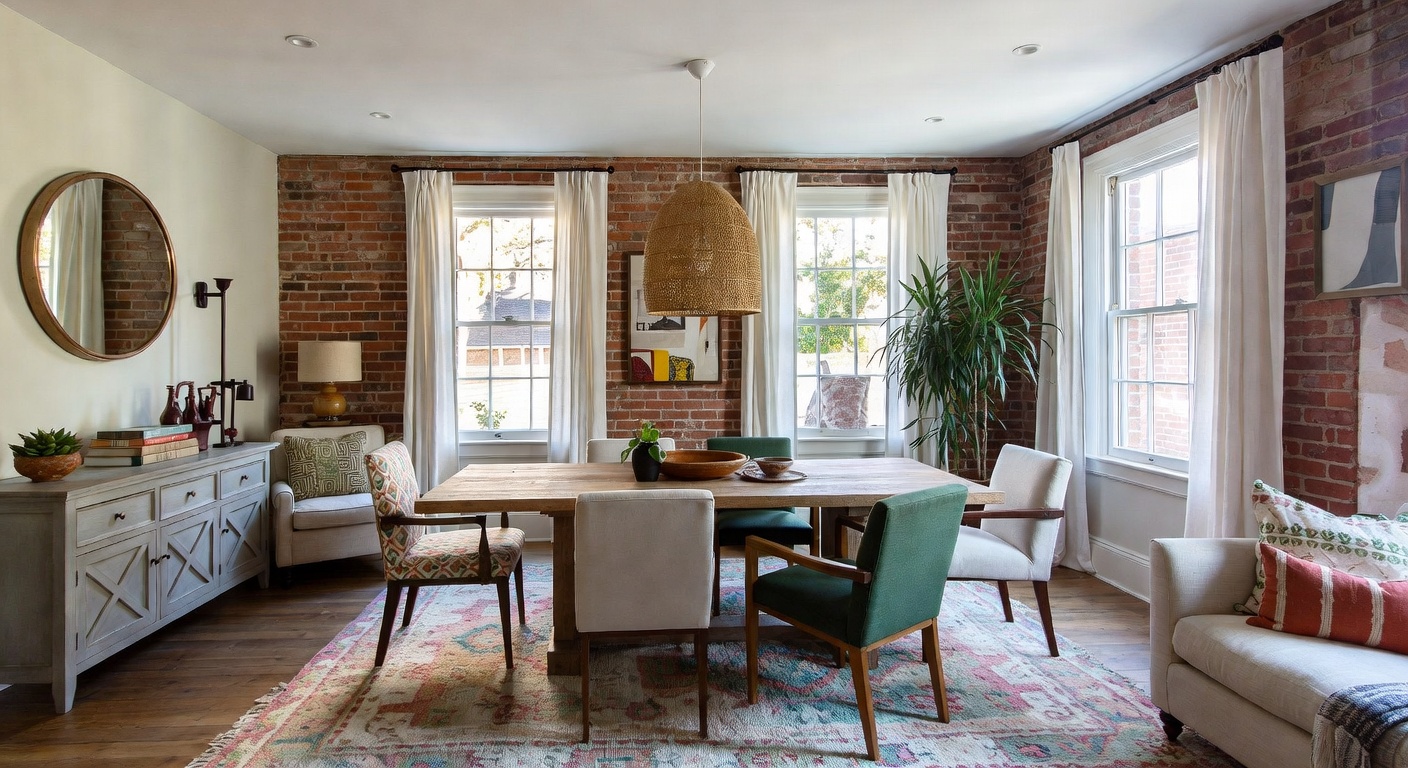
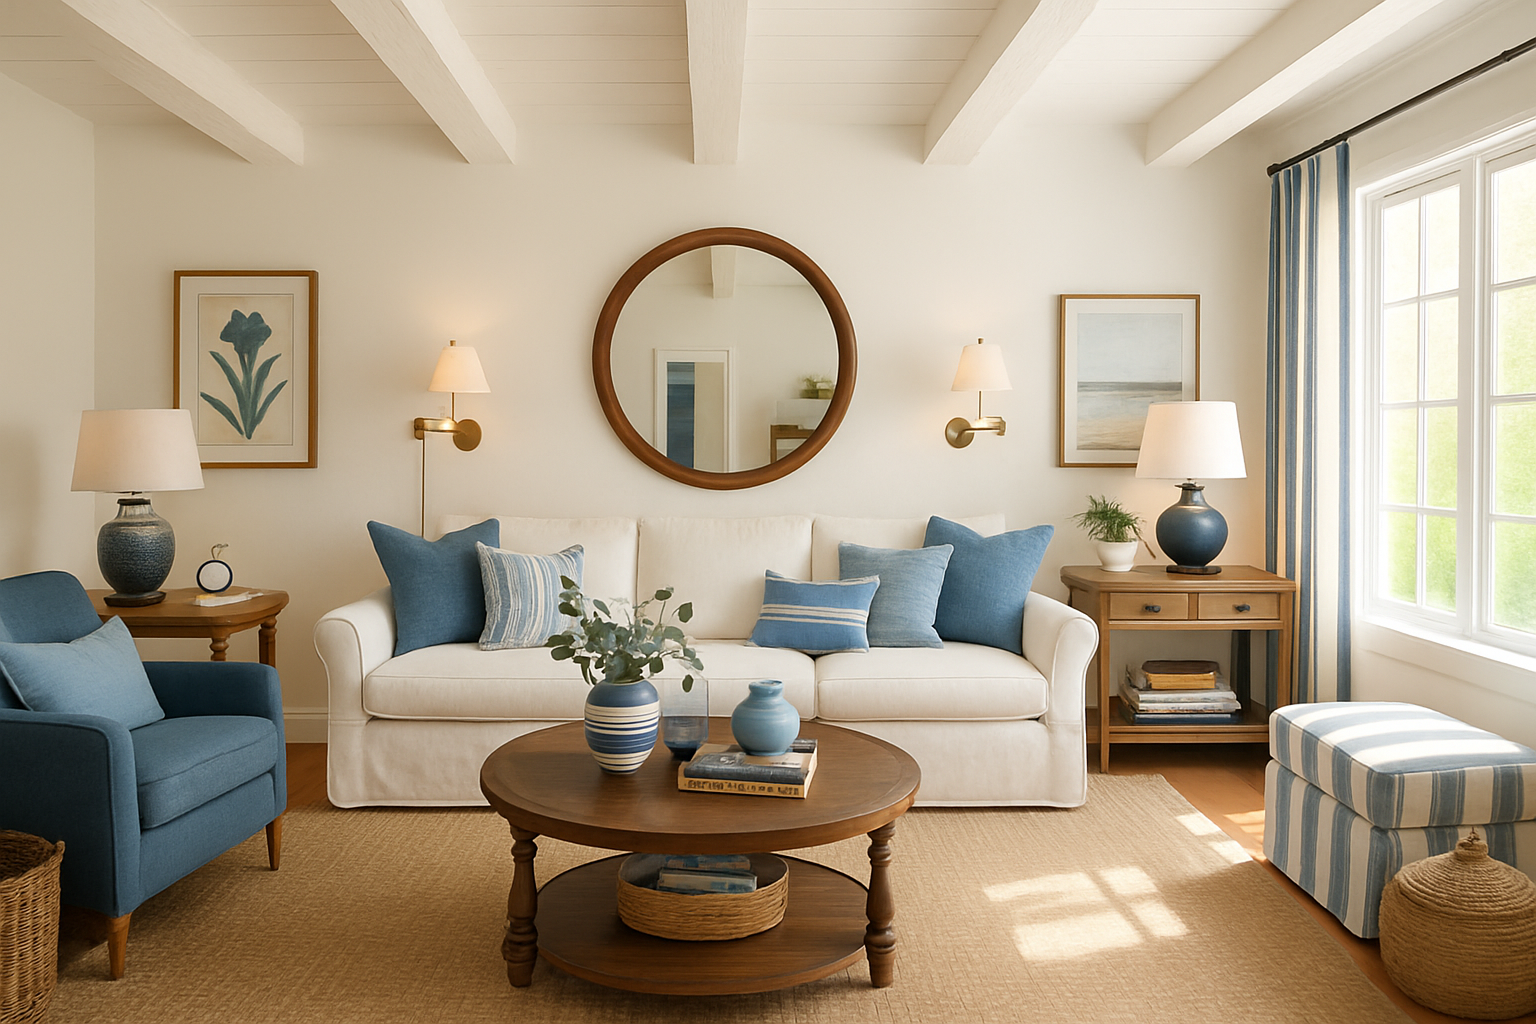
Living Rooms
Your living room is the room guests see first and where your family spends the most time. It also tends to accumulate furniture over years without a cohesive plan. An AI living room redesign shows you what the space could look like with intentional styling.
Bathrooms
Bathrooms are small spaces where material choices dominate. Tile, grout, fixtures, and vanity create the entire impression. The AI bathroom design tool is particularly useful for testing dramatic changes — like switching from white subway tile to Moroccan-patterned zellige — before you order 200 square feet of tile.
Advanced Features Worth Exploring
Once you're comfortable with the basics, these features take your results to the next level.
Style Fusion
Can't pick between two styles? Style fusion blends them. Scandinavian-Industrial. Modern-Farmhouse. Japandi (which is itself a fusion of Japanese and Scandinavian). The AI combines the defining elements of each style into something cohesive. This is where AI design genuinely outperforms manual mood-boarding — it can visualize combinations that are hard to imagine in the abstract.
Whole-House Design
If you're redesigning multiple rooms, the house design wizard generates a cohesive moodboard first, then designs each room to match. This ensures your kitchen, living room, and bedroom feel like they belong in the same house rather than three different Pinterest boards.
Shop the Room
Found a design you love? The Shop This Room feature analyzes your AI-generated design and finds real products you can buy that match the furniture and decor in the render. It even filters by budget level — low, medium, or luxury.
From AI Render to Real Renovation
An AI design is a starting point, not a finish line. Here's how to turn it into reality.
Save your favorites. Generate multiple options, save the ones that resonate, and live with them for a few days. First impressions matter, but so does the design you keep coming back to.
Extract the key elements. Look at the render and identify the 3 to 5 changes that make the biggest visual impact. Usually it's wall color, one major furniture piece, textiles (curtains, rugs, pillows), and lighting. You don't need to replicate every detail.
Start with paint. If the AI render shows a different wall color, start there. Paint is the highest-impact, lowest-cost change in any room. A $40 gallon of paint can transform a space more dramatically than a $2,000 sofa.
Show the render to professionals. Contractors, painters, and furniture salespeople respond well to visual references. Instead of saying "I want something modern but warm," you show them the image. It eliminates miscommunication.
Common Mistakes Beginners Make
Uploading blurry or dark photos. The AI works with what you give it. A well-lit, in-focus photo produces significantly better results. Take 30 extra seconds to get a good shot.
Ignoring the room type selector. Choosing "bedroom" when you're uploading a living room photo confuses the AI about what furniture belongs in the space. Match the room type to your actual photo.
Trying to replicate the render exactly. The render is a direction, not a specification. Aim for 80% match and you'll be thrilled with the result. Chasing 100% leads to frustration and overspending.
Only trying one style. The best part of AI design is speed. Generate five or six styles for the same room. You might discover you love industrial design when you've always assumed you were a "farmhouse person."
Skipping advanced options. If your first result isn't quite right, don't give up. Add a color preference, specify a material, or adjust the lighting mood. Small tweaks in the options often produce dramatically better output.
Cost Comparison: AI Design vs. Traditional Approaches
| Approach | Cost | Timeline | Output |
|---|---|---|---|
| Professional interior designer | $2,000 - $15,000+ | 2-8 weeks | Detailed plans, sourcing, project management |
| Online design service | $300 - $1,500 | 1-3 weeks | Mood boards, shopping lists, layout plans |
| AI room design (NewInterior AI) | Free to start | Under 60 seconds | Photorealistic renders of your actual room |
| DIY with Pinterest | Free | Hours to weeks | Saved images of other people's rooms |
AI design doesn't replace a professional designer for complex renovations. What it does is eliminate the expensive discovery phase — the weeks of back-and-forth figuring out what you want. Many users generate AI designs first, then bring their favorites to a designer for execution. Others use the renders as their complete guide for a DIY weekend project.
For specialized use cases, we also offer tools for real estate agents doing virtual staging and interior designers who want to show clients options faster. Check the design glossary if any terminology is unfamiliar.
Frequently Asked Questions
Do I need design experience to use AI room design?
No. The tool is built for beginners. You upload a photo, pick a style from a visual menu, and the AI handles everything else. No knowledge of color theory, spatial planning, or furniture terminology required. If you can take a phone photo and tap a button, you can use it.
How accurate are AI room designs?
The renders are photorealistic and based on your actual room's dimensions and layout. Color schemes, furniture styles, and material combinations translate directly to real-world purchases. Architectural modifications (like adding a fireplace or removing a wall) are aspirational suggestions rather than structural recommendations.
Can AI design a room from an empty space?
Yes. AI works with both furnished and empty rooms. For empty rooms, the AI fills the space with furniture, decor, and styling appropriate to the selected room type and design style. This is particularly useful for virtual staging of new construction or recently moved-in spaces.
How many styles can I try for the same room?
There's no limit to the number of styles you can generate for a single photo. Most users try 3 to 10 styles before settling on a direction. Each generation takes under 60 seconds, so testing multiple options takes minutes rather than the weeks a traditional designer would need to prepare alternative concepts.
What's the difference between AI room design and hiring a designer?
AI gives you instant visual exploration — dozens of style options for your specific room in minutes. A designer gives you deep expertise — material sourcing, contractor coordination, custom solutions, and project management. Many people use AI first to narrow their vision, then hire a designer for execution. See our guide on room makeover ideas for practical ways to bridge the gap.
Start Designing Your Room in 60 Seconds
You've read the guide. You know how it works. The fastest way to understand AI room design is to try it with your own space.
Take a photo of the room that's been bothering you. The one you walk into every day and think "this could be better." Upload it, pick a style that catches your eye, and see what's possible.
Create your free account and generate your first AI room design right now. No credit card required, no design experience needed — just a photo and 60 seconds.
Ready to Transform Your Space?
Try NewInterior AI and get professional interior designs in seconds.
Get Started Free